
Knowing the pitch of your roof is important when deciding what type of roof you want. Most materials have a minimum or maximum pitch requirement.
For example, asphalt shingles have a minimum slope of 2:12 while Clay tiles have a minimum slope of 4:12.
Some people define pitch and slope differently. For the purpose of this article pitch and slope will be used interchangeably to mean the steepness of your roof.
If you remember from back in grade school, the Slope = Rise/Run. That is essentially all there is to measure the slope of your roof. There are different ways of writing the slope or pitch. A slope with a 3:12 pitch means that for every 12 inches the roof rises or drops 3 inches.
This can also be written as:
- 3:12
- 3/12
- 25%
- 14°
All of these mean the same level of steepness. So we understand what slope is, now what is the easiest way to measure it?
I have found 4 different ways to measure the slope or pitch of your roof. I will let you decide which is easiest for you.
1. Pitch Measurement App
Yes, there is an app for that! Be careful about which app you choose because some are not accurate. One app that I found in the android store that seems the most accurate is called Pitch Guage.

Now I am not sponsored by them and I am not receiving any commission from recommending them. It is just one that I found that I liked. But there are plenty of other apps that you can choose from that can work for you.
Pitch Guage has two different ways of measuring the slope of your roof. The first one does not even require you to be on the roof. All you do is simply line up the side of the roof with the top white bar on the screen.
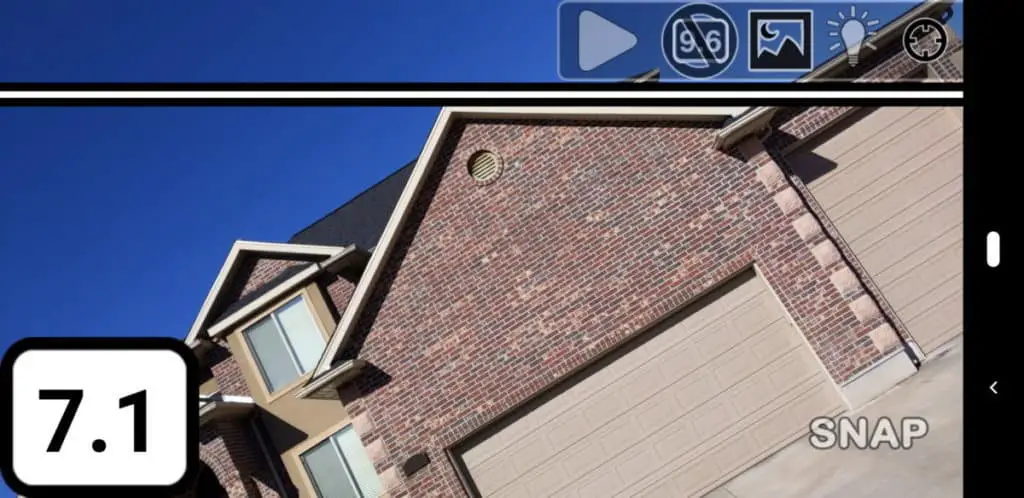
However, I found it harder to be accurate with this method. When I first lined it up it said the slope was a (6.6/12), but I already knew the slope of this roof is a 7:12 so I lined it up as such.
It would be easy to misalign it so the reading is not as accurate. However, the main advantage of this method is that you do not have to get on the roof.
The app has another way of measuring the pitch of the roof. But this method does require you to get on the roof or to use a ladder.
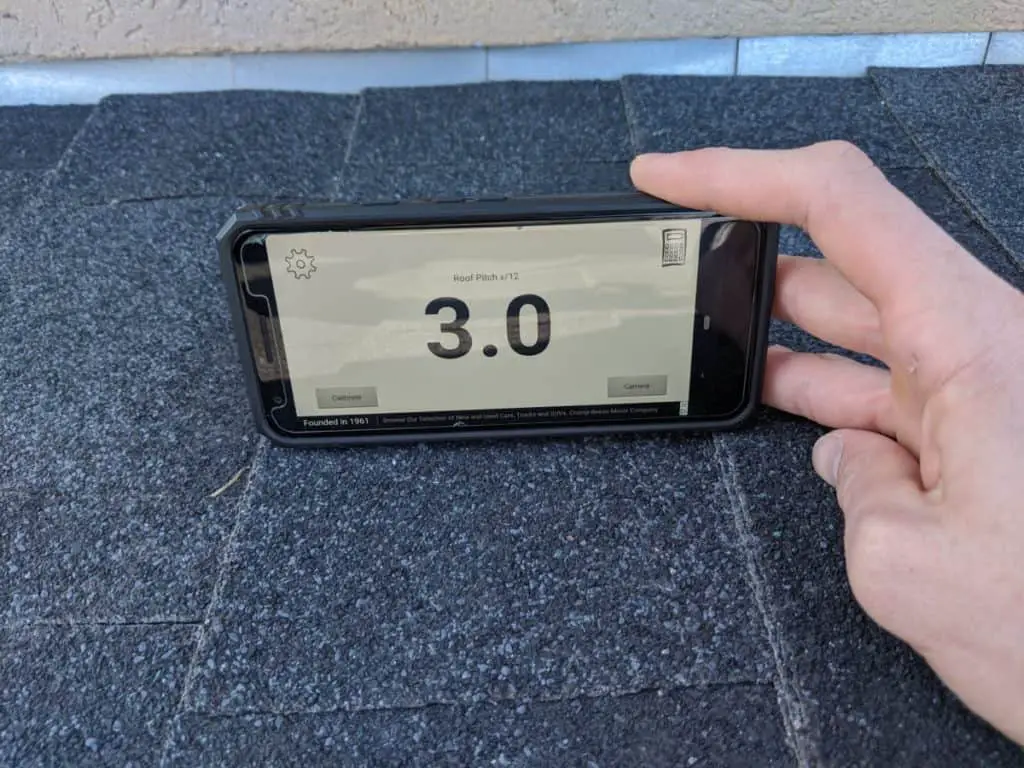
This second way to measure is by placing the phone on the roof to get the estimate. Because the phones are small and the surface of the roof may have different bumps and divots this method may not be as accurate.
Knowing the slope of this roof beforehand I was able to adjust the phone on the shingles until it gave an accurate reading of 3:12. It was reading about 2.2 to 3 so it is good enough to give a rough estimate.
But the actual results may vary slightly depending on if shingles are curling or other rough surfaces are present.
If you are looking for a ball-park estimate then this app would be a quick and easy solution to finding the slope of your roof. But if you want a more accurate method then you can try one of these other methods.
2.Using the Slope Chart
This method is a bit more accurate but requires you to access the ridge of your roof. Be very careful when walking on a roof, especially if you are not used to walking on roofs. I have fallen off a roof before and it was not fun.
If you are going to walk on a roof make sure that it is dry. Wet or frosted roofs are very slippery even on a roof that is not very steep. You should also make sure that there is not a lot of loose gravel or granules.
As shingles wear down the sand-like granules break free and make the roof surface slippery. If you notice a lot of granules and you are planning on replacing your roof soon, then you can sweep off the granules with a broom as needed.
Choose shoes that have a rubber sole. The rubber helps to give you better traction. However, be careful where you step as to not damage the shingles or whatever material your roof is made out of.
Some roofing materials like clay tiles and slate should not be walked on. Doing so can cause the fragile tiles to break. You can click here to learn more about all the different types of roofing materials that are used today.
So the slope chart is a tool that made for your convenience. All you simply need to do is print out the chart then get on the roof with a level or ruler.
Click here to open up the printable measurement tool.
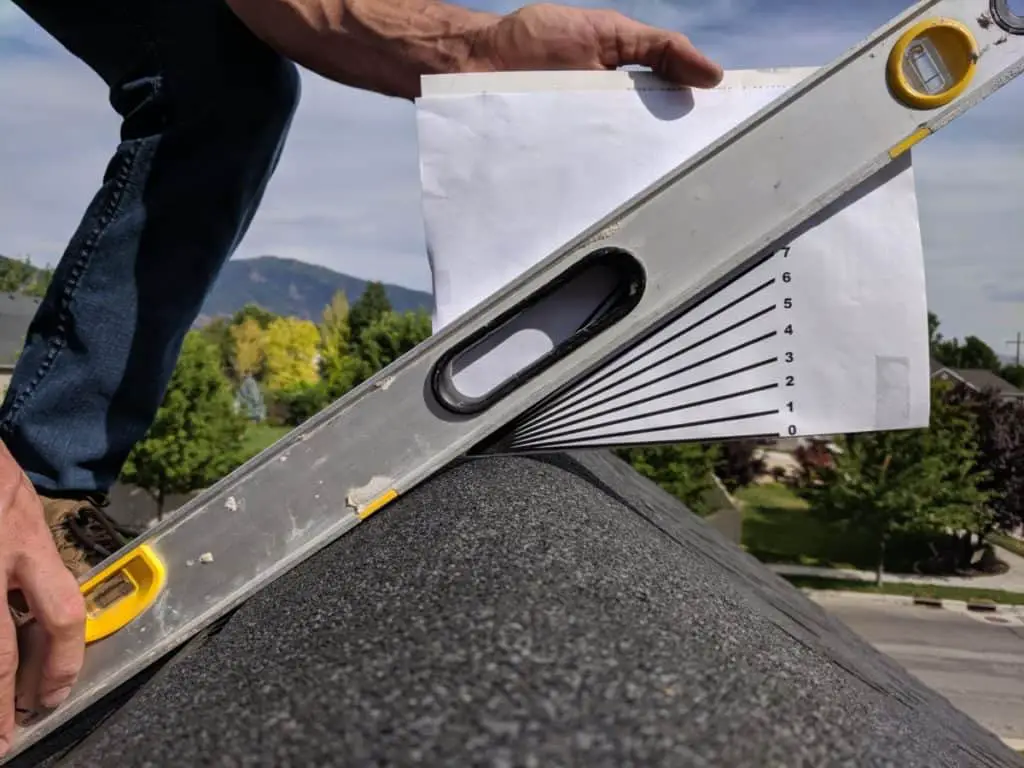
As you can see the slop of this roof is 7:12. I found it easiest to tape the printable measurement tool to a hardback book so it does not get blown around in the wind.
If done properly this method is accurate. The downside is that it requires you to scale up to the top of your roof. If you do not want to do that, there are other methods you can choose from.
3. Two Ruler Method
The two ruler method is easier because it does not require you to climb up to the top of the roof.
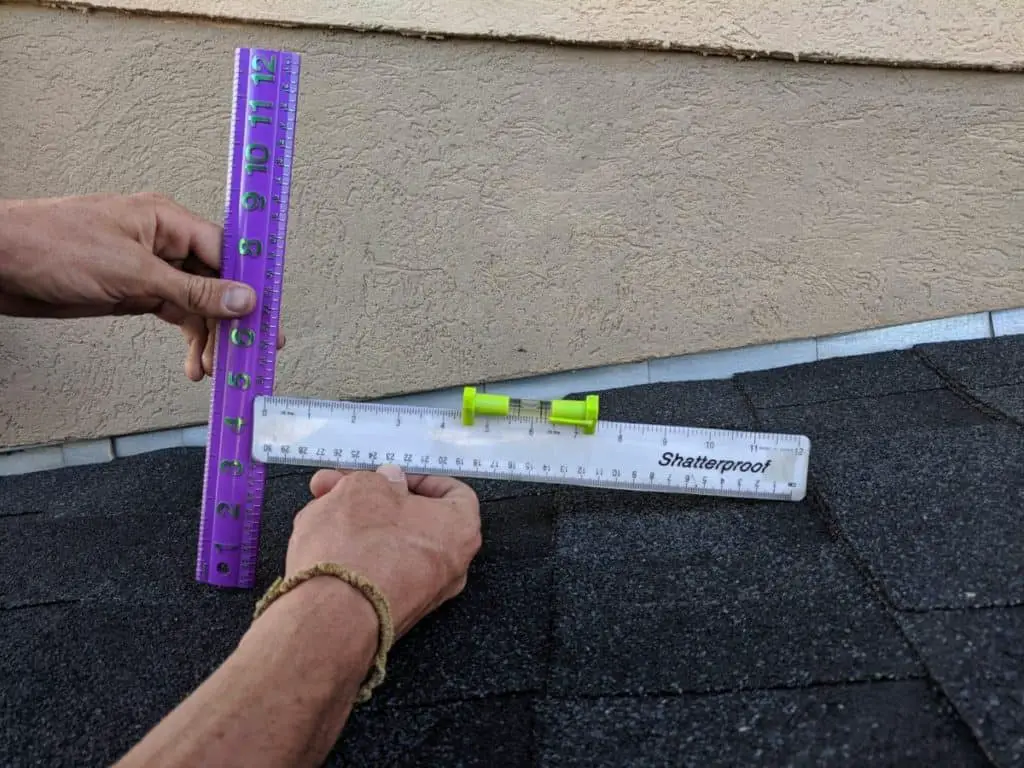
For this method, you will need two rulers and a level. The level is good because it allows you to be more accurate.
With the 1st ruler, you simply measure 12-inches over. With the 2nd ruler, you measure how many inches the roof drops. This gives you the rise/run.
The image above shows that the slope of this roof rises 3 inches for every 12 inches.
Another way to measure the slope of your roof is to use a ladder.
4. Ladder Method
The ladder method is another way you can measure the slope of your roof without having to walk on your roof. This would be a good method for those who can’t walk on their roof because the roofing material is too fragile for walking.
The ladder method involves measuring the side of the roof underneath the rafters.
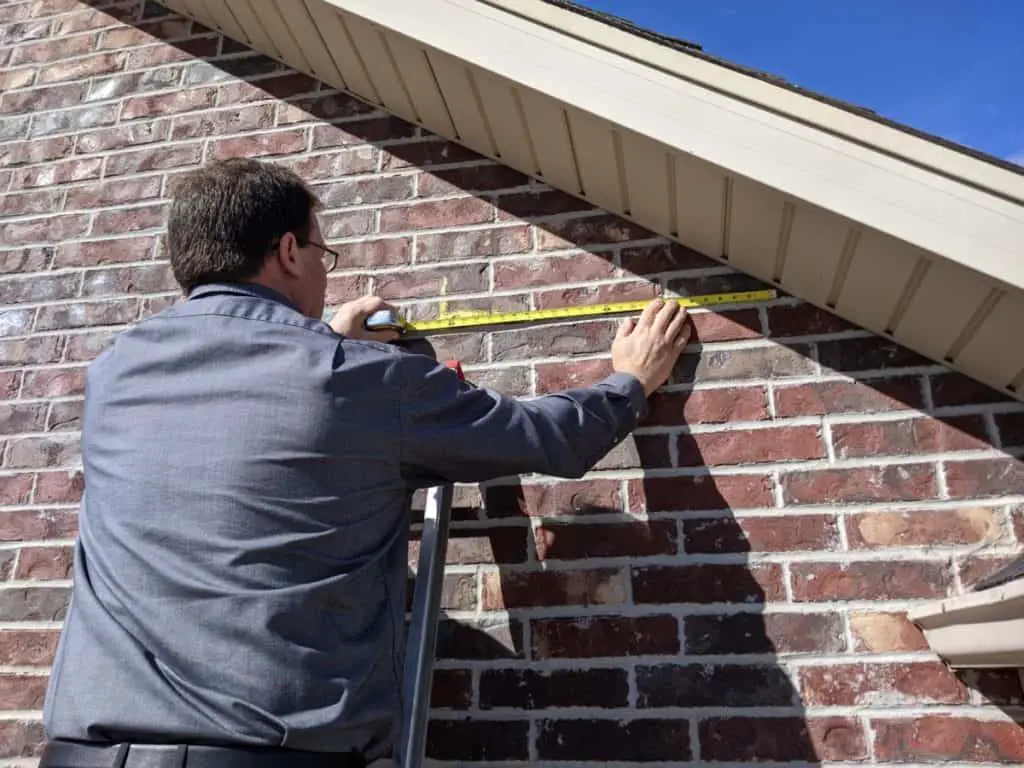
First, you will want to measure the base or the “run”. The pitch of the roof is measured with a 12-inch base. So you will want to make a mark with some chalk at the 12-inch mark or any increment of 12-inches (you can simplify later).
You will want to make sure you are measuring straight so it may be helpful to use a long level like this (link to Amazon).
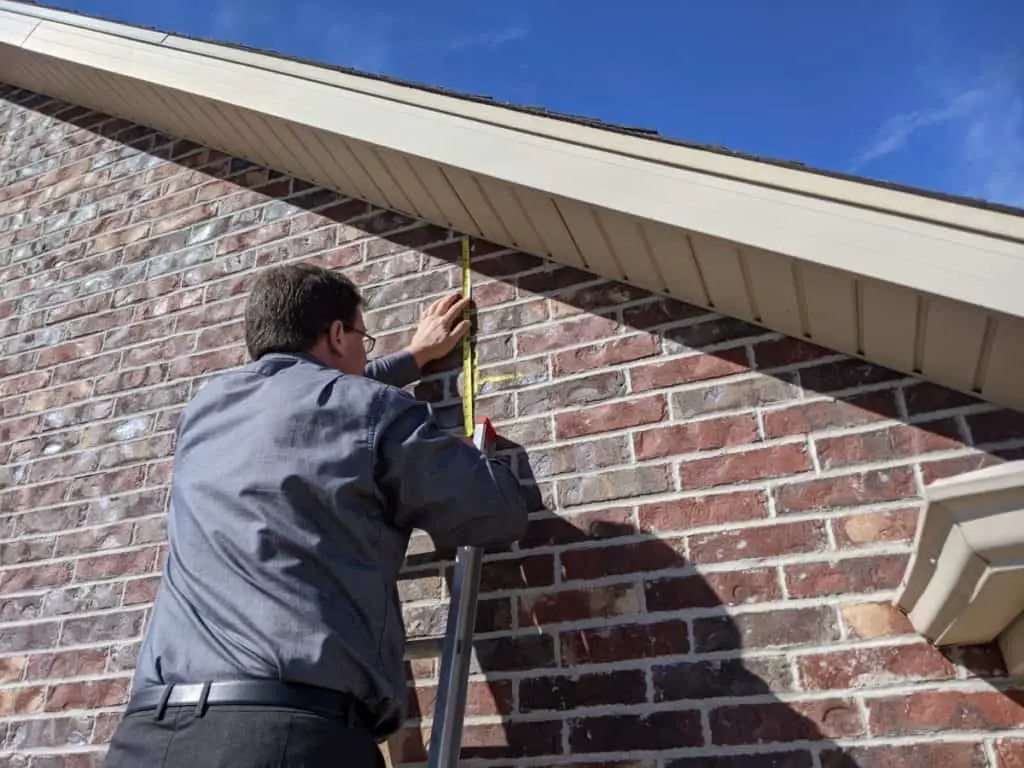
Next, you will want to measure the height or the “rise” of the roof. Measure this from the chalk mark you just made to the top of the rafter. This will give you the “rise”.
If you measured the base out to 12″ inches then the height is your slope. Example: Base = 12″ Height = 7″ Slope = 7:12
Or if you did it in increments of 12″ then you could have measured out 2 feet as the base in which case the Base = 24″ and the height= 14″ where the slope would be 14/24 which simplifies to 7/12.
5. Get a Roof Inspection

Another option to finding out the slop of your roof is to ask a roofing professional for a roof inspection or quote. Each company will have their own way of doing it.
Some companies may go out to your house and measure everything themselves, while others will go through a third party software company.
If you choose this route of hiring someone else, you may be able to get a free quote or estimation, or it may cost a small fee.
If you want to figure out all the dimensions of your roof on your own, you can use the same software that some contractors use. Click here to read about my list of the top 10 best roofing estimation software.
Minimum Pitch for Roofs
Every roofing material has a recommend minimum pitch needed for that roof material to work properly. Here is a list of roof materials and the minimum pitch needed.
| Type of Roof Material | Minimum Pitch Required for Installation |
| Asphalt Shingles | 2:12 |
| Built-Up Roof (BUR) | 0:12 |
| Clay Tiles | 4:12 |
| Concrete Tiles | 4:12 |
| EPDM Rubber | 0:12 |
| FleeceBack | 0:12 |
| Metal Roof | 3:12 |
| Modified Bitumen | 0:12 |
| PVC | 0:12 |
| Roof Gardens | 0:12 or more accurate 2% |
| Rubber Slate | 3:12 |
| Slate | 3:12 |
| Solar Tiles | 3:12 |
| Spray-On Roof | 0:12 |
| TPO | 0:12 |
| Wood Shingles | 3:12 |
| Wood Shakes | 4:12 |
Quick Pitch to Angle Chart
| Pitch | Angle | Percentage |
| 1:12 | 5° | 8% |
| 2:12 | 10° | 17% |
| 3:12 | 14° | 25% |
| 4:12 | 19° | 33% |
| 5:12 | 23° | 42% |
| 6:12 | 27° | 50% |
| 7:12 | 30° | 58% |
| 8:12 | 34° | 67% |
| 9:12 | 37° | 75% |
| 10:12 | 40° | 83% |
| 11:12 | 43° | 92% |
| 12:12 | 45° | 100% |
| 13:12 | 47° | 108% |
| 14:12 | 49° | 117% |
| 15:12 | 51 ° | 125% |
| 16:12 | 53° | 133% |