TPO roof membrane is one of the newest innovations for flat roof membranes. Developed within the last few decades, TPO has become more popular than PVC and EPDM. With its flexibility and durability, its easy to see why it has become so popular.
This is a photo guide that will help you to understand what TPO is, why do people like using it, and how to install it.
What is TPO?
TPO is a single ply low slope roofing membrane. It is made up of Thermoplastic Polyolefin layers. Each layer is made from Ethylene propylene rubber, and talc carbon filler or fiberglass. The talc carbon filler, or fiberglass is a cloth like woven membrane that gives extra strength and durability.
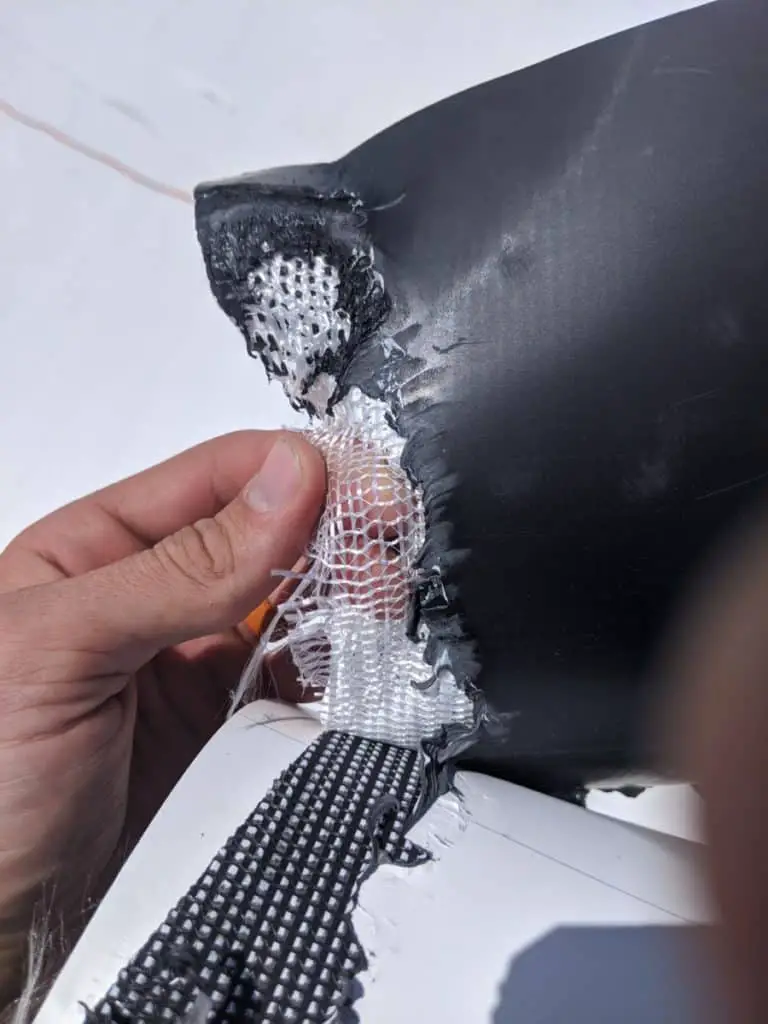
The thermoplastic polyolefin layers are weldable to create a water tight seal that protects the roof all types of weather and UV radiation.
TPO can be installed in one of three ways.
- Mechanically Attached – secured using special screws and plates.
- Ballasted – (See Built-Up Roof Style Options)
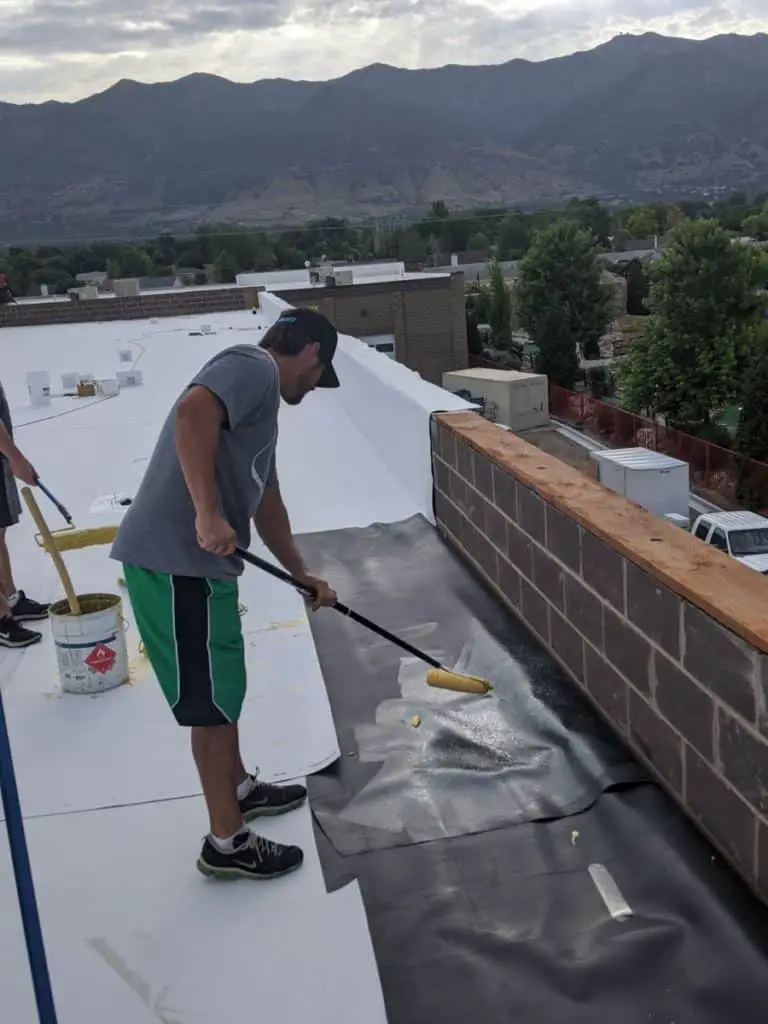
- Fully Adhered – It can be adhered to the roof using a liquid adhesive, tar mopping, or by a fleecedBacked system with a 2-part foam.
Why Choose TPO?

There are many reasons why people prefer TPO over other roofing materials (You can click this link to visit my other article on 17 Different types of roofing materials).
Some of the advantages of TPO are:
- Its Durable
- Easy to Install
- Flexible
- Requires Little to No Maintenance
- And Many More
If you want to learn more about the advantages and disadvantages of TPO. You can check out this article I wrote about 19 Pros & Cons of TPO Roof Membrane.
Now that you have a basic understanding of what TPO is and some of the benefits of using TPO. Its time to move on to how to install TPO.
How To Install TPO Roof Material:
Some steps in the guide may be different depending on what installation method you choose to go with. This step by step guide focuses on the mechanically attached method for installing TPO. However, the basic steps are the same for all methods.
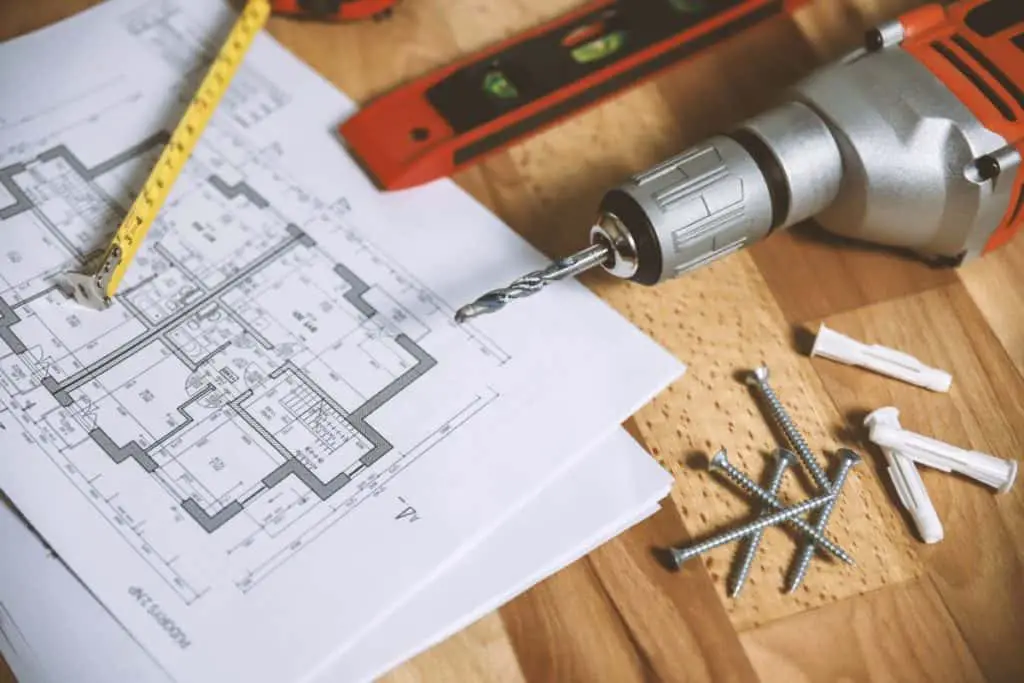
Materials & Tools Needed:
Before you begin with anything you will need to measure the size of the roof so you can make sure to purchase enough material.
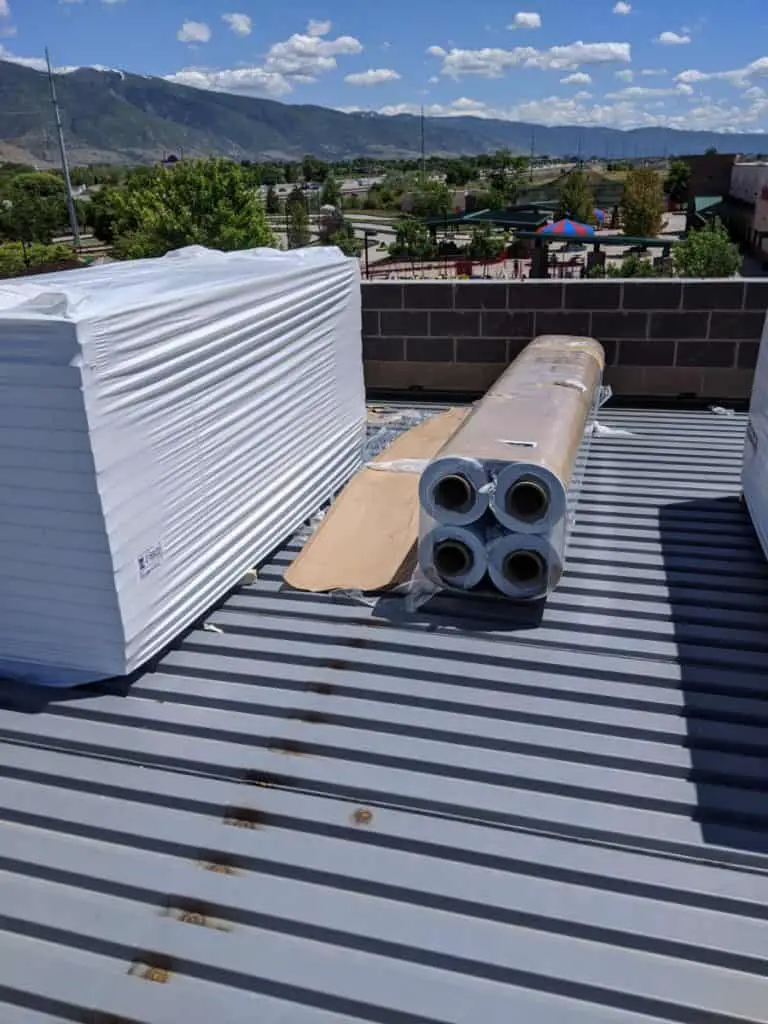
The first thing you will need to purchase is insulation foam and TPO.
The insulation foam varies in depth depending on the application. For residential roofs the foam can range anywhere from 0.5″ to 1″. While commercial roofs may have many more inches of insulation. It depends on the roof and the client.
The TPO Rolls vary in sizes ranging anywhere from 4 ft to 10 ft tall rolls. You will likely need to purchase multiple sizes, especially if you have walls you need to cover like on commercial roofs.
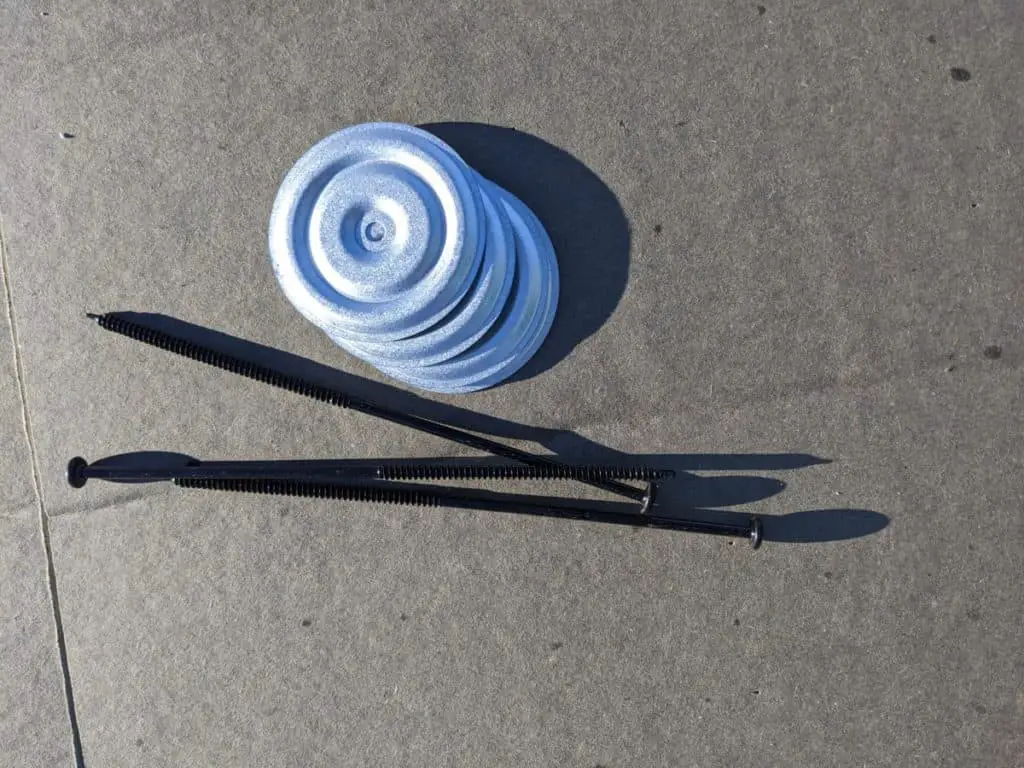
The next item you will need to is fasteners and plates. The fasteners and plates are used to secure down the foam and the TPO.
The screw fasteners vary in height and must be measured in accordance to how much foam you will be using.
There are two different type of plates that you will need. One is used to secure the foam to the roof decking, the other is used to secure the TPO down. As you can see in the picture below one plate is smooth and the other plate has rivets or spikes.
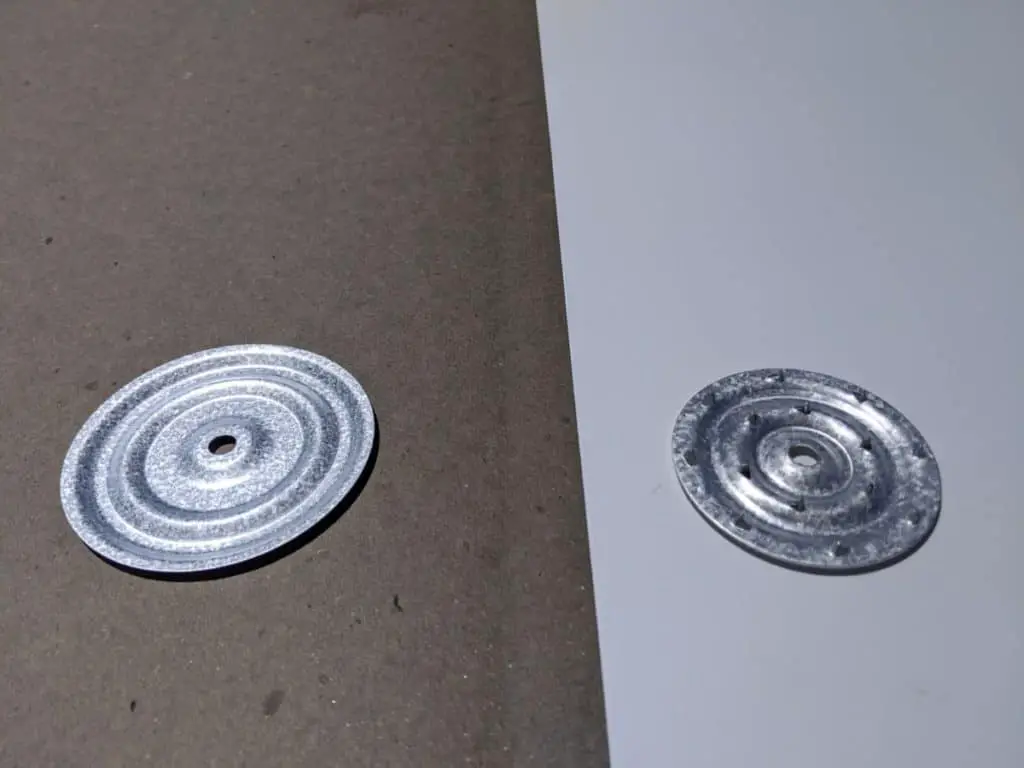
The smooth plate (on the left) is used to secure the foam boards down.
The other one on the right with the spikes is used to secure the TPO down. The spikes grip into the TPO making it much more secure. Don’t worry this will not cause a leak as you will see why later.
If you have walls that you need to cover in TPO, then you will likely need a liquid adhesive.

Liquid adhesive can also be used over the mechanically fastened screws and plates. Especially for FleeceBacked membranes.
The adhesive can be purchases at your local roofing supply company.
In addition to the liquid adhesive, you will need a stirring stick to mix it with and some rollers to apply it with. Here are some extendable rollers found on amazon that you can use to apply the adhesive.


This roller cover is made specifically for applying adhesives. You can check out the price for it here on Amazon.
Next you will need something to cut the foam with. I recommend having two types of tools for cutting foam.
A small hand held foam cutting knife with a serrated edge. Which you can find on Amazon here.

This small hand held knife is perfect for making small intricate cuts around pipes, sky lights, drains, etc. For larger cuts I recommend getting a reciprocating saw.

DEWALT makes a nice compact reciprocating saw. It makes it so much faster and easier to make large cuts. You can check it out the price for this saw on Amazon.
A drill is another essential tool for installing TPO. You will need to screw down the plates and fasterners.
I found the best drill is one with an extra handle and a chord so you do not have to worry about dealing with batteries.
I recommend this drill by DEWALT, you can check out the price for this drill on Amazon.


Another tool you will need, is used to heat weld the TPO.
This small hand welder is perfect for doing small seams, patches, and around intricate cuts.
I recommend this one from amazon because it comes with the roller and basic heat welding nozzles.
For larger seems that need to be heat welding you will want to purchase or rent an automatic heat welder.
This makes it much easier to weld the large seams of TPO, because it allows you to walk along side the heat welding machine.
You can check out prices for this welder on Amazon.

Click Here To See Other Recommend Roofing & Sun Gear
Now that we have all the tools necessary to get started and we have ordered the materials we can begin with the next part of the process.
Step 1: Prepare Roof
The preparation includes making sure that you have all the materials delivered, and you have all the tools necessary to complete the job.
You will need to make sure the roof surface is clean and cleared of large debris and moisture. Water and excess moisture that gets trapped underneath the TPO will cause mold and other potential problems down the road.
You will also need to make sure that OSHA regulatory safety precautions are followed to ensure a safe working environment. You can click here to learn more about OSHA safety and standards.
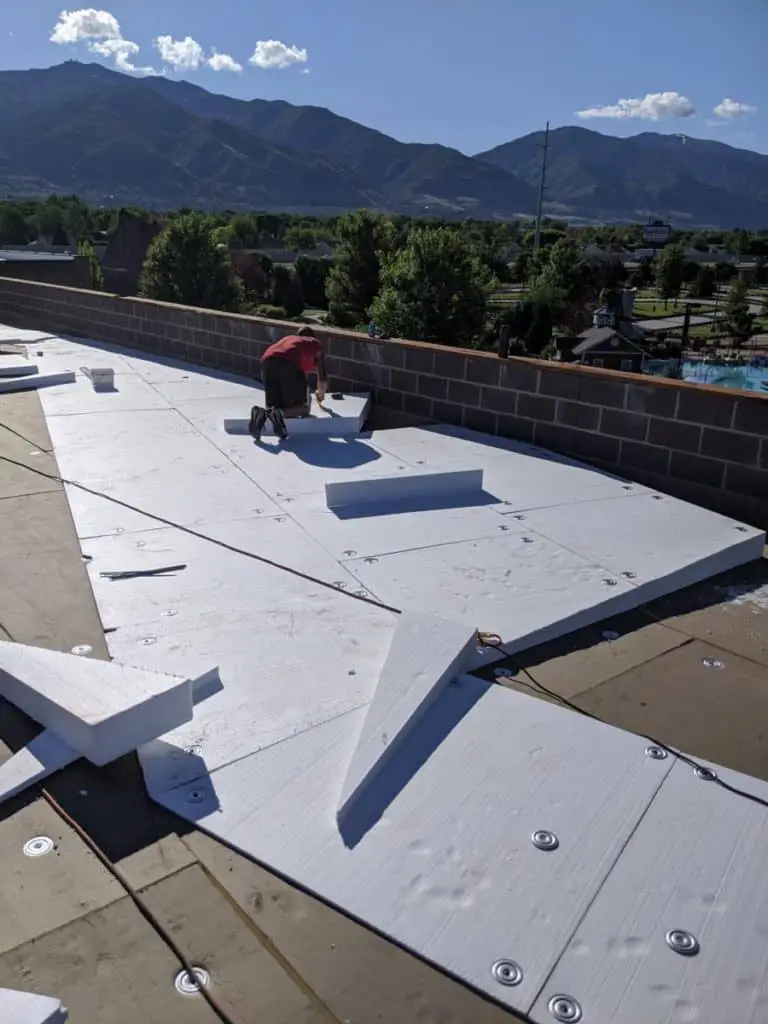
Step 2: Install Insulation Foam
After the roof surface has been prepped, the next step is installing the insulation foam. When laying out the foam it is best practice to stagger the foam in both directions.
For example if you are laying two layers of foam, as seen in the photo above, you should stagger the foam by cutting the first piece in half and then placing a full piece next to it on the side.
Likewise, for the second layer you would stagger it by placing a half piece of foam on top of a whole piece of foam and vice versa.
Staggering the foam helps give added strength, a smoother surface, and helps to better insulate the roof.
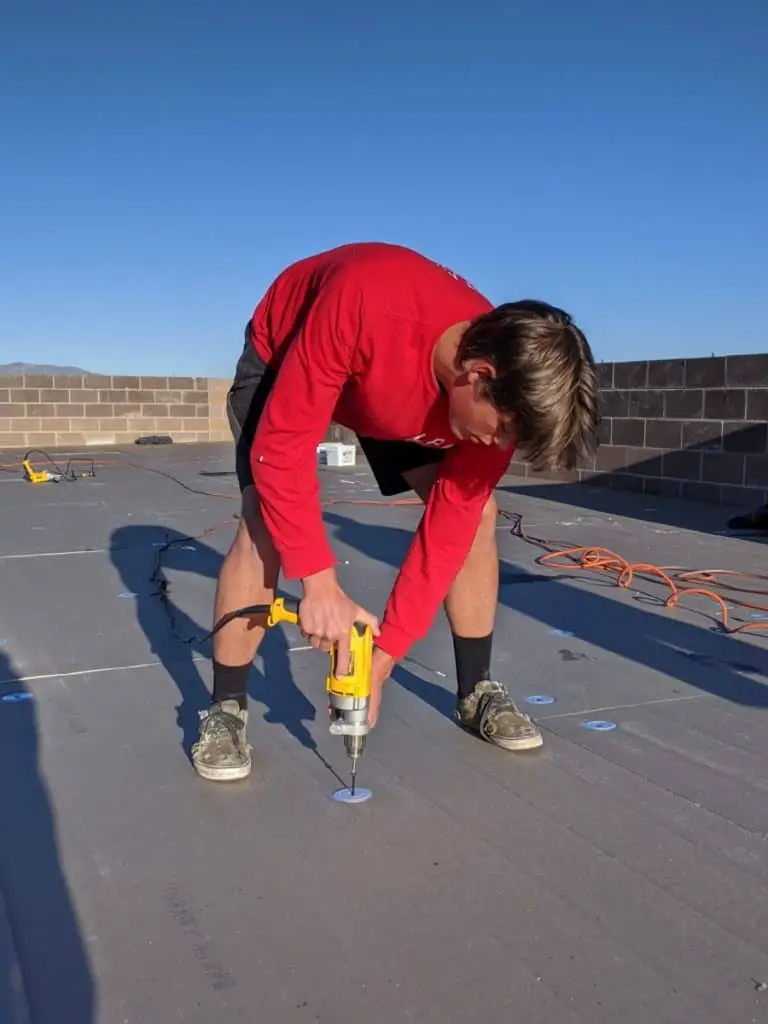
Next, the insulation plates and screws are lightly placed into the foam along the edges and in the middle of the board for easier drilling.
The fasteners are then screwed down into the roof surface securing the insulation foam board to the roof floor.
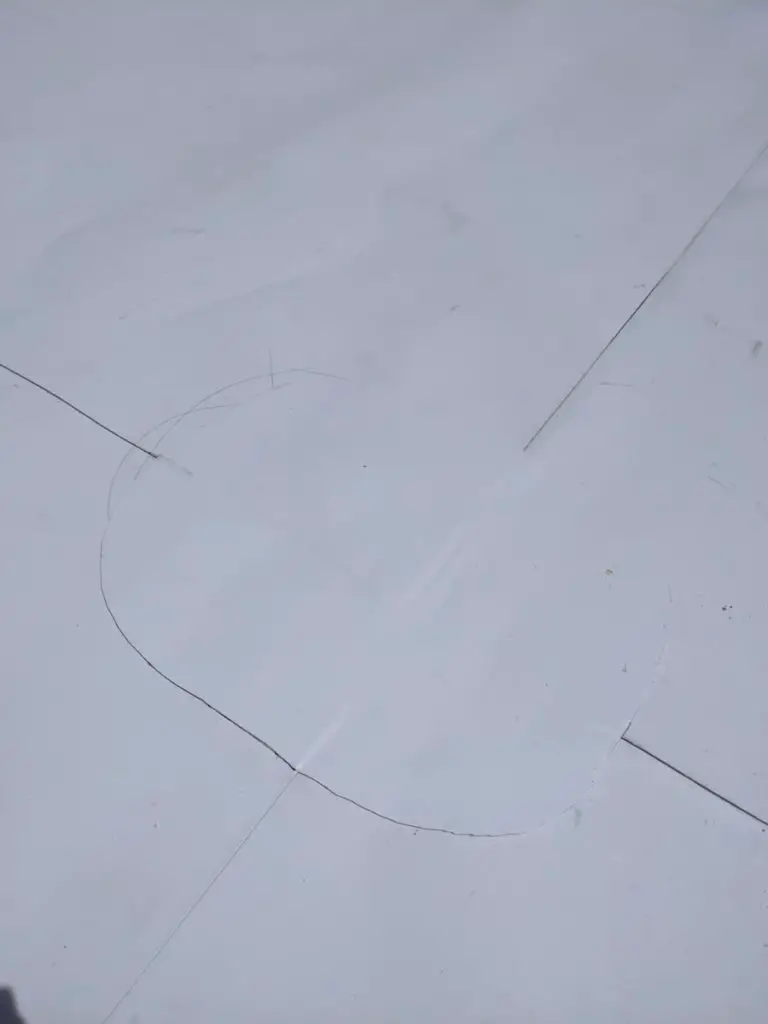
Step 3: Cut Vents & Pipes
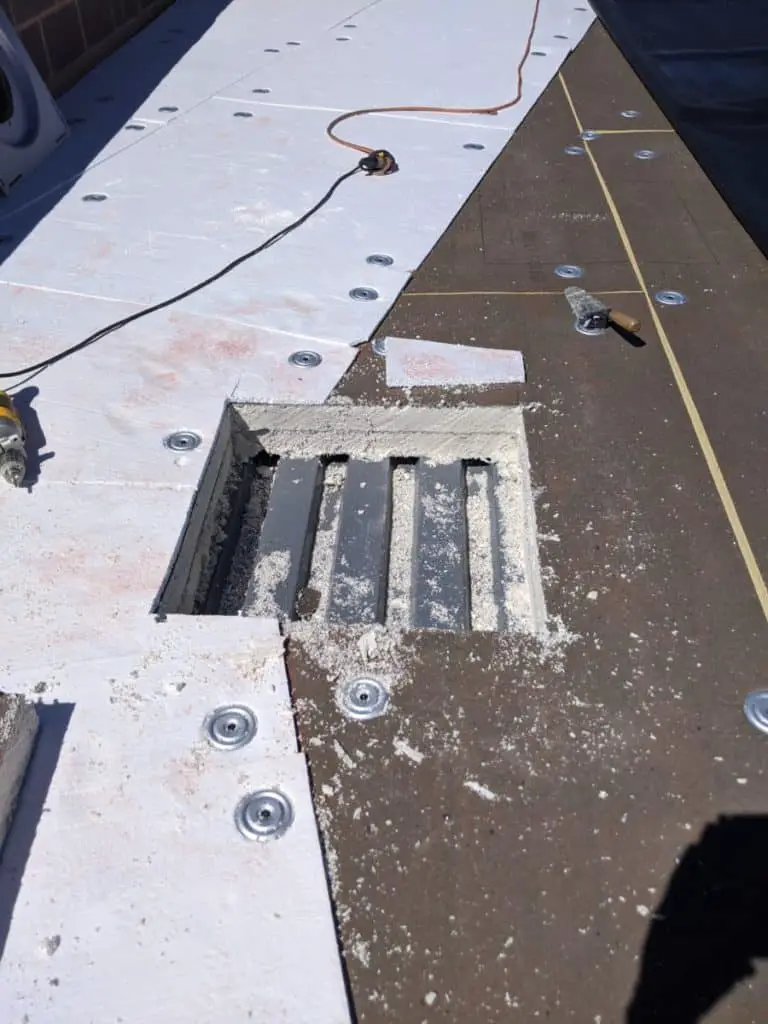
Depending on whether you are working on a new roof or restoring a roof will determine the order of this step. If you do not have any of the pipes or drains set up then you will need to cut the foam at the location for these protrusions.
You can also add specialty foam used to create a slope in the roof. This specialty foam is sloped to control water flow into a drain.
Some roofers believe it is best to lay the specialty foam underneath the straight foam boards. But from my experience, it is easier to lay the specialty foam on top of the level foam boards.
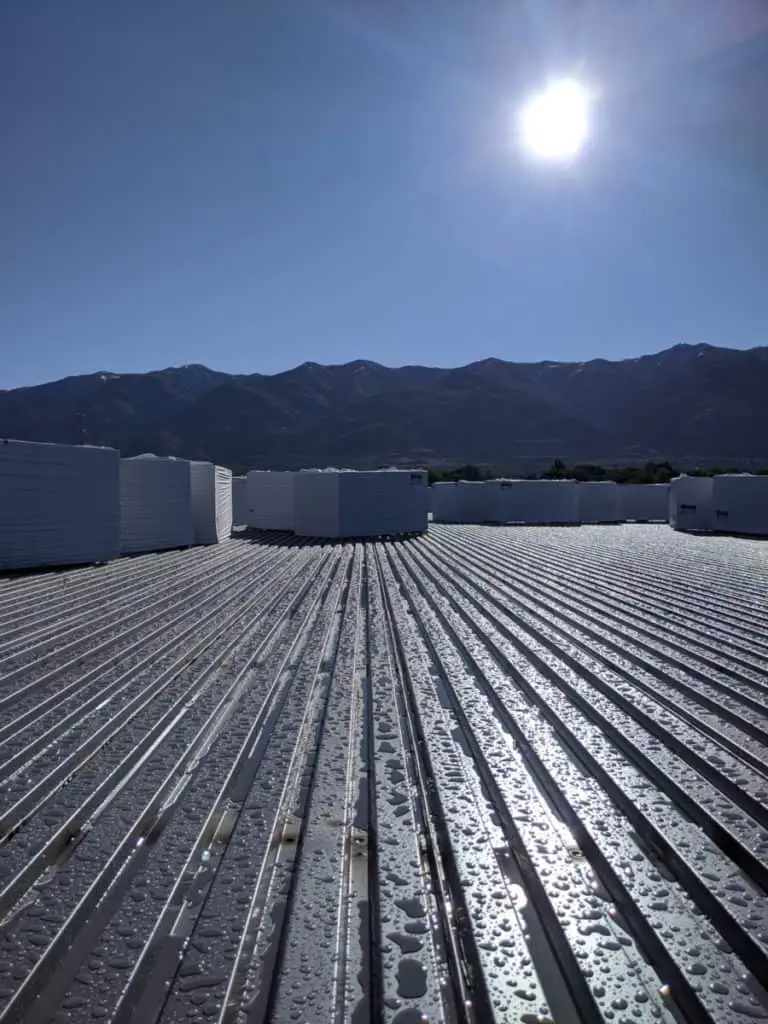
Once you have all the insulation in place, its time to start rolling out the TPO.
Step 4: Set the TPO
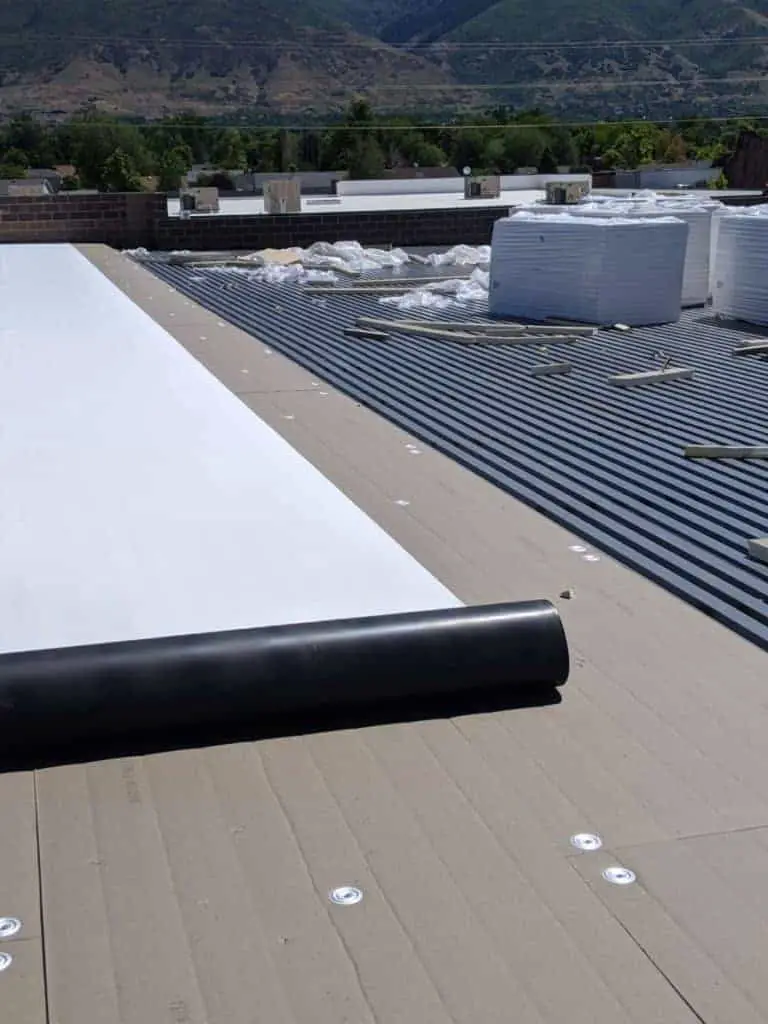
The TPO rolls are quite heavy and awkward to carry for one person. You will need to set the TPO fairly straight before you unroll it.
Start at the edge of the roof next to the wall or edge. If the roof has bordering walls, then you are okay to leave about an inch of a gap between the TPO and the wall because the wall will be covered in TPO later. In the case of these photos you can see a bordering wall along the edge of the roof.
However, if you do not have any bordering walls, then you will need to run the TPO over the edge of the roof and cut it flush later.
Next, you can roll out the TPO a few feet and adjust it to make sure its straight. Once its straight, continue rolling out the rest of the TPO until you reach the end of the roof, or you run out of TPO.
If the laid TPO contains any wrinkles or is not straight you will need to adjust this by securing one end of the TPO and pulling tight on the other end to remove the wrinkles.
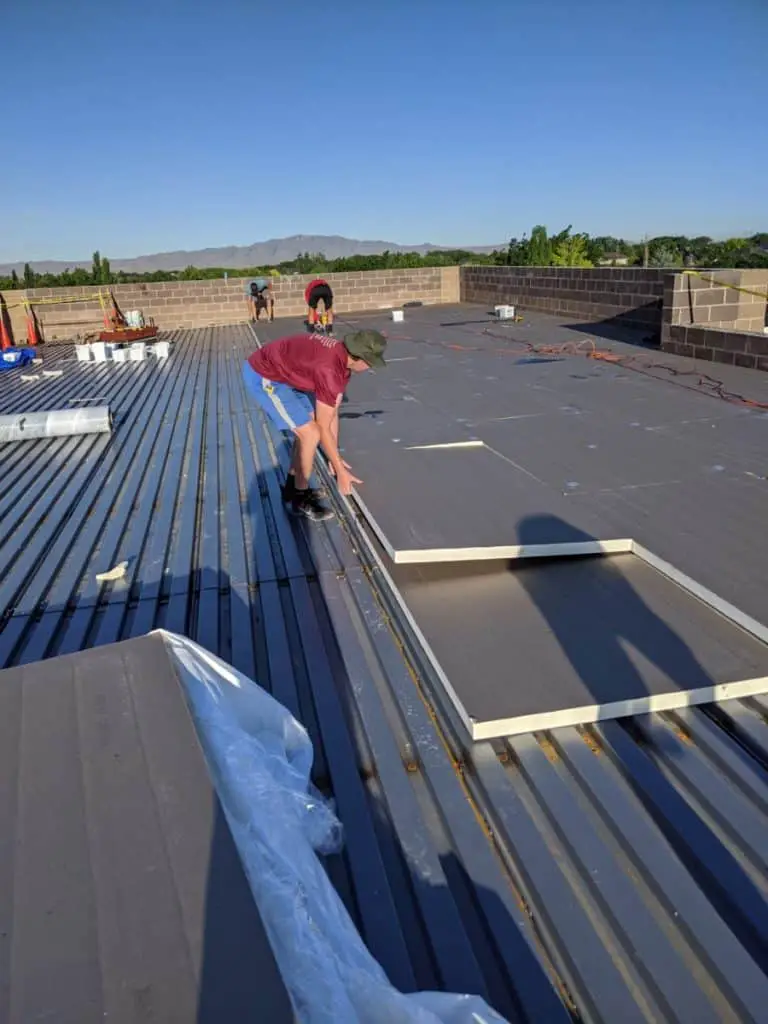
After the TPO has been set and is straight, it will need to be secured down to the insulation boards and roof surface.
Step 5: Secure TPO
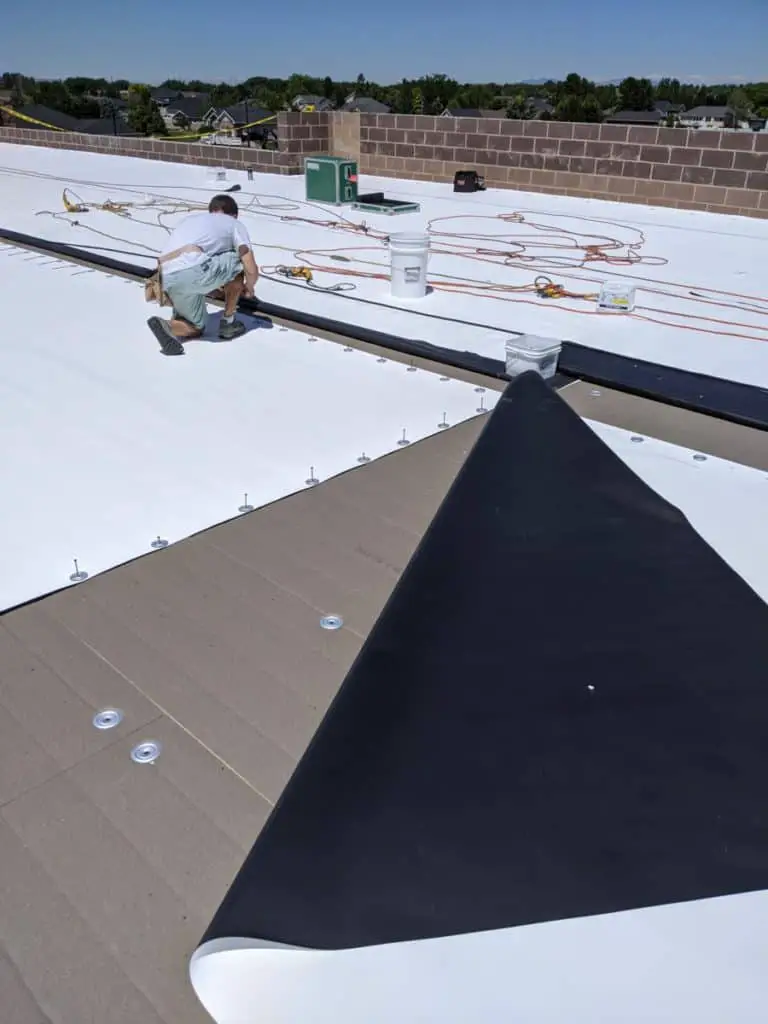
To secure the TPO, you will need the TPO plates with the spikes and the appropriate length of fasteners that will reach the roof surface underneath the insulation.
Place the TPO plates along the top and sides of the TPO (as seen in the photo above). You do not want to put plates along the bottom edge of the TPO because that bottom edge will go over the top of the next row of TPO.
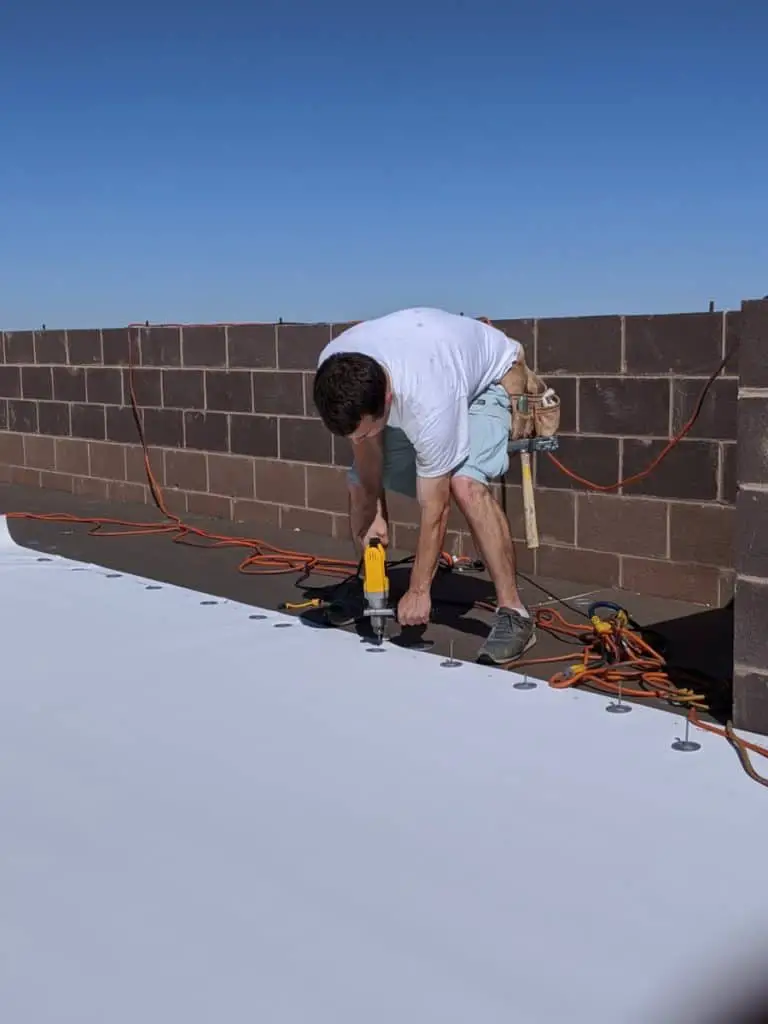
Secure the plates and TPO down by tightening down the fasteners with a sturdy drill. Its important to not over tighten the plates because it will cause divets in the foam board which look bad and could cause problems later on.
After the first row TPO has been secured down with the TPO plates and screws, you can add the second row of TPO following the same steps.
The second row of TPO should overlap 3 inches past the row of plates on the top of the first row of TPO. This overlap ensures that the TPO plates get covered and allows for the seams to be heat welded later on.
The plates along the sides of the TPO will also need to be covered by the TPO used along the walls. If no walls are present then no plates should be added to the ends of the TPO.
After at least two rows of TPO have been secured, you can start heat welding. If you have a large crew, then multiple people may do each of these steps simultaneously.
For example, a few people may be installing the insulation, while some are laying the TPO.
Step 6: Heat Weld the TPO Seams
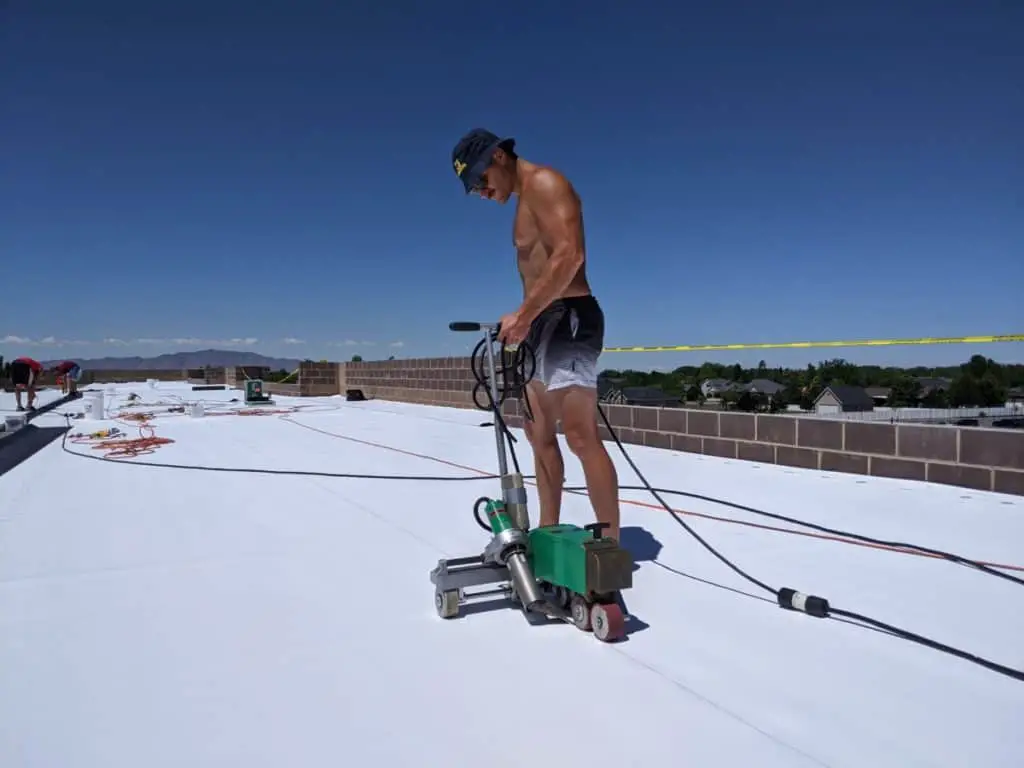
This step requires the use of the automatic heat welder. It is very important that all the seams are heat welded and sealed. If there are any holes or imperfections it will cause a leak.
For this reason I highly recommend practicing on scrap pieces of TPO before starting any heat welding.
The automatic heat welder is used for the long seams where the two rows of TPO over lap and cover the metal plates. You should have left a few inches past the metal plates to allow room for the automatic heat welder.
Make sure you will have enough extension chords to allow you to run the entire span of the seam before you start welding. Once you start heat welding, you do not want to stop until you reach the end of the TPO row.
To heat weld, you warm up the automatic heat welder, and align the guidance wheel with the edge of the TPO.
Be sure to check that the heavy rolling wheels are also in line and straight on the edge of the TPO. Next, place the heating element underneath the TPO edge and turn on rolling switch.
This moves the automatic welder forward. You will need to watch it and make sure it is staying straight and in line with the edge of the TPO.
In order for the TPO to have a solid sealed weld it needs two things:
- Heat
- Pressure
The automatic heat welder provides both of these by the weighted wheels and the heating element. These two things will need to occur when you hand weld.
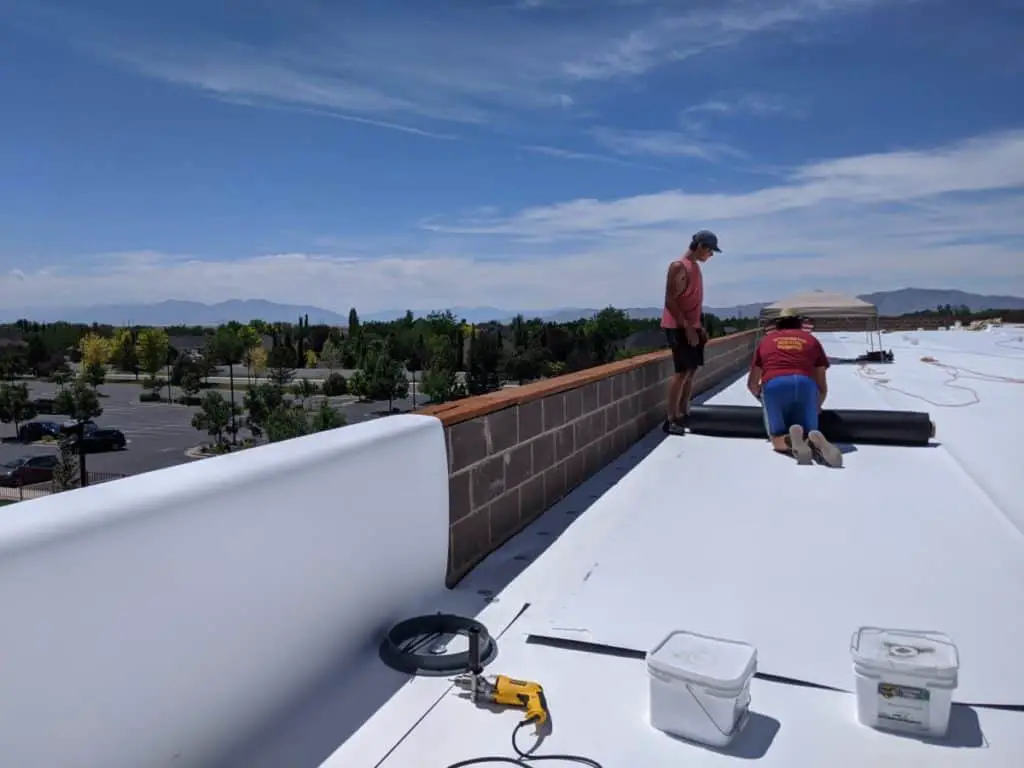
Step 7: Apply TPO On Walls
This step may not be necessary in your specific case. If you do not have any walls then simply cut along the edges of the roof and weld down the edges to the TPO coated metal.
Start by rolling out the TPO along the walls and cutting into sections where necessary to keep it straight.
TPO comes in a variety of sizes, make sure you have a size that is big enough to cover the entire top of the wall and extend past the bottom of the wall about 4 inches with the corner of the wall being tucked in.
Next, you will want to tack the bottom of the wall TPO to the top of the floor TPO. Do this by only welding a small spot at the bottom of the TPO close to the corner of the wall.
You will need to tack it on each of the ends and about every 3 – 4 ft making sure to leave room for the automatic heat welder.
The tacking will help to hold the wall TPO in place. The wall TPO is attached to the wall by a low viscosity liquid adhesive.
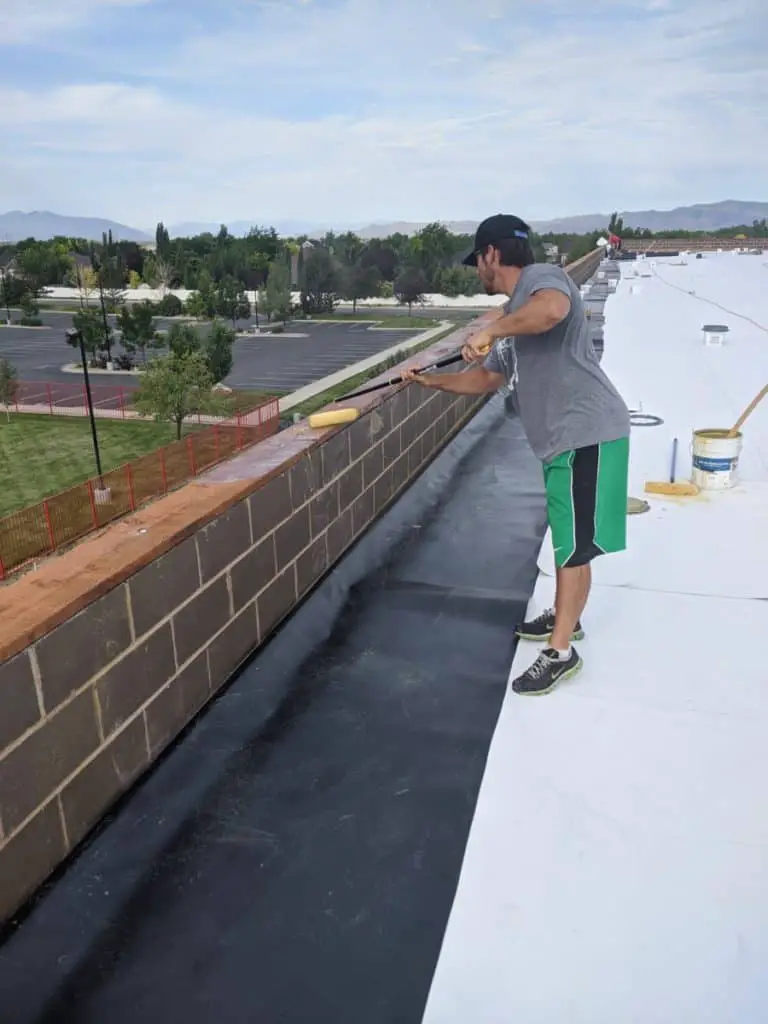
You will want to first apply the liquid adhesive to the top and side of the wall. The liquid adhesive should be applied to both surfaces, so you will also need to apply it to the back side of the TPO.
The TPO will not stick to the wall until the adhesive has become tacky. Under the heat of the sun, the adhesive will become tacky and dry much faster so you will need to work quickly.
Once the glue is set, then you can lift the TPO flap up and over the wall being sure to press in the corner of the wall at the bottom and slowly working up.
Avoid wrinkles by pulling the sides tight and smoothing out the surface as you go.
You will also get wrinkles or a kink in the TPO if it is not straight or the bottom is not level. Cutting specific lengths will help avoid this problem.
Over lapping wall pieces will need to be heat welded by hand later.
Once the wall TPO has been adhered to the wall you can now go back and heat weld the bottom of the wall with the automatic welder.
Step 8: Hand Weld Joints
A joint is where the corners of the TPO on the rows all meet up. These along with any bad welds will need to be patched.
To create a patch cut out a square shape of TPO of the necessary size, then round the corners.
Its important to round the corners and any other sharp corner or edge of the TPO membrane to provide the best seal. Sharp corners or 90 degree edges can pull up or separate easier than a rounded one.
To hand weld the patch, you need to provide the two main things I mentioned earlier, heat and pressure. Use the hand welder to provide the heat and the hand roller to apply the pressure.
Its best to hand roll evenly and roll it all the way through past the edge of the TPO to ensure the entire edge is sealed down.
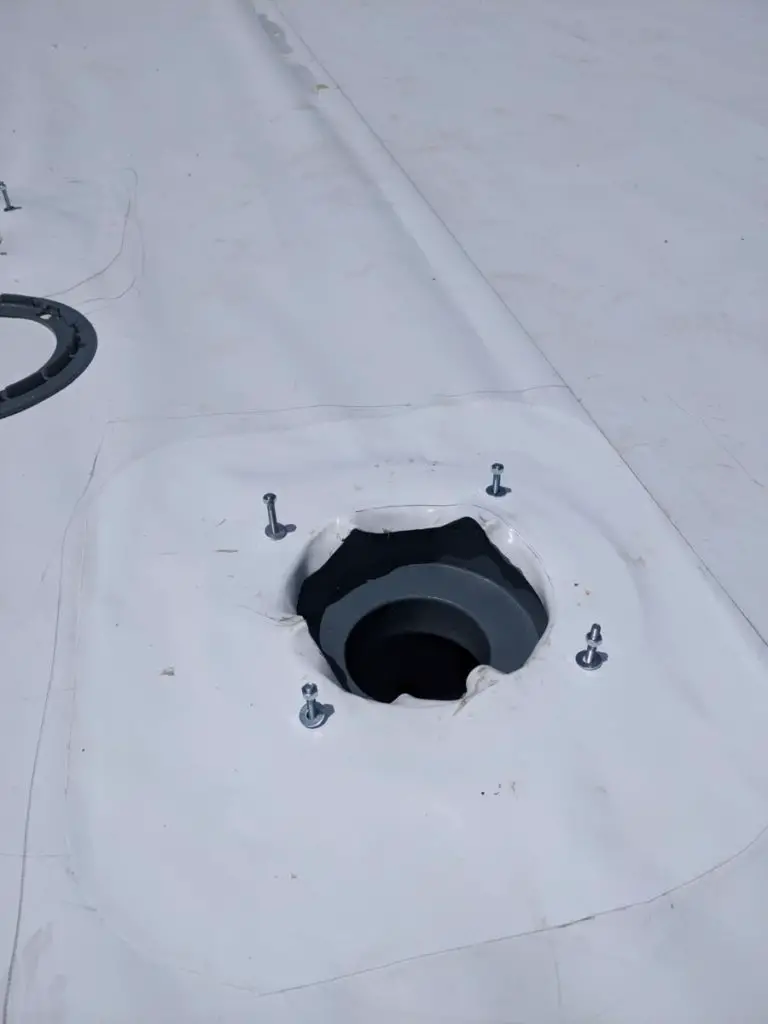
If any drains have been cut and installed, or any sky lights, pipes, etc. Then you will also need to hand weld a covering around those to ensure that no water leaks in.
Once everything has been heat welded and patched, and you have checked that all the seams are sealed. Then you can finish by installing the wall metal.
The wall metal not only completes the roof and makes it look good, it also helps to keep the TPO secured to the wall.
After that, you can enjoy the reward of a job well done and a durable roof. If any holes or leaks develop you can create a new patch and hand weld it on to fix the hole.
Not Sure if TPO is Right for You?
If that is the case, there are many other roofing materials that you could use.
I wrote an article explaining what different types of roofing materials are available for flat or low slope roof systems.
You can check out that article by clicking this like here.
I also spent many hours writing a guide on 17 different types of roofing materials that covers both flat roofs and sloped roof options. You can read that article here.
