Whether you’re a roofing contractor or a homeowner who is getting your roof replaced by a contractor. There are 32 things you can check during the 4 steps of the roofing process that will ensure you, or the homeowner a quality roof replacement experience.
The 4 main steps of the roofing process are:
- Preparation
- Tear-Off & Installation
- Clean Up
- Finalization
Preparation
- Customer Reviews and Reputation. If you are the homeowner, check customer reviews and ask trusted people to make sure you are hiring a good roofing company that doesn’t cut corners. Likewise, if you are a roofing contractor, make sure you do honest quality work to get good reviews and build a good reputation.
- Communication to ensure the roof replacement occurs on a day that has good weather (not raining) and the homeowner is in town. You don’t want it raining while roofing, it makes the roof more dangerous due to lighting and slippery surfaces. There is also the chance of getting the attic insulation, or other components wet and causing mold problems.
- Discussed beforehand the type of roof materials to be installed. For example, asphalt shingles, metal, clay tiles, TPO. The brand and quality of shingles to be used, and what colors are available to choose from.
- Discussion about the warranty options available for the roof.
- Discussion about other materials like the type of vents, and pipe flashing to be used, the brand and type of underlayment to be used. If you are the homeowner make sure the underlayment brand is the same brand as the shingles. Because some manufacturers will void the warranty on their shingles if the underlayment came from a different brand.
To learn more about the difference between Synthetic Underlayment and Tar Paper click here and scroll to the third heading.
- Discussion about special circumstances on the roof like a swamp cooler removal, satellite dish removal, heat-cables, and any re-installation thereof. Some people may want old satellite dishes or swamp coolers permanently removed.
- Discuss and plan for a dumpster or dump-trailer to be placed near home.
- Special circumstances for the property. This includes possible damages that may occur to flower beds and fences due to falling shingles. Discuss what measures will be taken to prevent damage and what compensation if any, will be given if damages do occur. This may include covering grounds, fences, and AC units with tarps, blankets, or any other means to protect them.
- Discussion about contractors’ trucks parking near home and homeowner’s car parking away from home.
- Limited access to the yard by pets & children. During the tear-off stage, there will be many nails on the ground that would be easy for kids or pets to accidentally step on.
- Discuss with the contractor the roof history of any previous leak spots.
Tear-Off & Installation

- Dumpster or dump trailer is properly placed near home.
- Use of tarps or other means to protect landscaping and property where possible. This includes moving patio furniture, covering outdoor AC units, vases, kids play toys, BBQ grills, etc. away from the home.
- Tear-Off of shingles and replacement of any rotted wood decking as needed.
- Wood decking is properly dried in with felt underlayment and Ice & Water shield as needed.
- Drip Edge is installed properly according to local codes. If you are interested in learning more about general codes and the purpose of Drip Edge you can click this link.
- All types of metal flashings and pipe flashings properly installed on rake walls, plumbing ventilation, and chimneys.
- Shingled properly by following the correct pattern for laying shingles and using starter shingles on all eaves. This includes having a 3/8″ overlay on the eaves. Using the proper number of nails per shingle on the manufacturer’s nail line to maximize wind resistance.
- Ventilation properly installed according to the manufacturer’s specifications and local codes.
- All exposed nails & boot collars properly caulked.
Clean Up
- Make sure all extra shingles, tools, and scrap garbage are removed from the rooftop.
- Check to make sure all gutters are clean & clear of debris.
- Confirm that all shingles, debris, wrappers, and scrap garbage are cleared from the property and landscaping. This also includes any tarps or wood that may have been used to protect the landscaping.
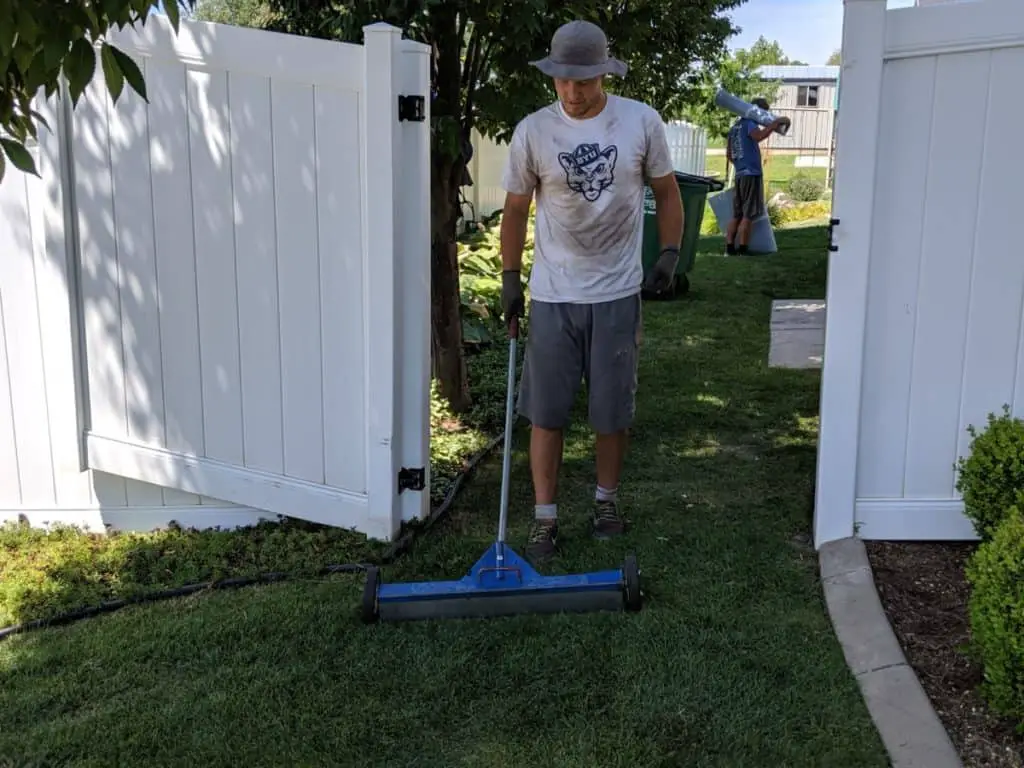
- Roofing nails should be removed from the property and driveway. This is usually done by using large magnets along the grass and landscaping.
- Roofing granules should be cleared off walkways and driveways. Usually swept off or blown off with a leaf blower.
- Any roofing tar marks on stucco, fences, or patios should be washed off.
- Note to roofing contractors: It is always better to leave the home in a better condition than what you found it. This will help build your company’s reputation for quality work and give you more referrals.
Finalization
- Dumpster or dump trailer should be removed from the property. Also, on the driveway where the dumpster was placed should be swept and cleared of any nails.
- Any extra materials not used removed from the property.
- Discussion with the homeowner to verify customer satisfaction. If you are a contractor and the customer was impressed with your work, then this is a good time to ask for a testimonial, and for a referral. Most people will happily help, and this will build your name a reputation.
- Final invoice statement should be given to the homeowner for payment.
- Order the warranty for the roof and give the documentation to the homeowner. This is if the homeowner wanted the warranty.